

Before
Cleanse the skin with Clean & Care Natural Micellar Water 120 ml to remove impurities and oils.
Cleanse the skin with Clean & Care Natural Micellar Water 120 ml to remove impurities and oils.
Step 1
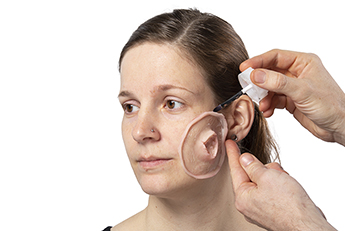
To protect the skin, before applying the Prosthetic, Marly Skin - Skin Protection Foam - a protective barrier foam - is applied to the areas of the skin where the Prosthetic will be used. The back of it is coated with a layer of Silicone Adhesive NEO Regular Bond 50 ml. After about a minute, apply the piece to the face and press it on well with your fingers. Also, make sure to tighten the ends and finish with some extra adhesive.
To protect the skin, before applying the Prosthetic, Marly Skin - Skin Protection Foam - a protective barrier foam - is applied to the areas of the skin where the Prosthetic will be used. The back of it is coated with a layer of Silicone Adhesive NEO Regular Bond 50 ml. After about a minute, apply the piece to the face and press it on well with your fingers. Also, make sure to tighten the ends and finish with some extra adhesive.
Step 2
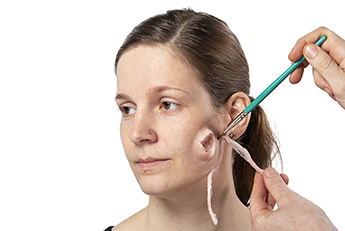
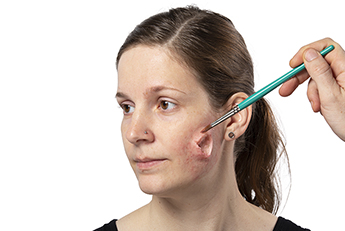
Transfer Acetone 100 ml to a disposable cup and use a synthetic, firm brush to remove the edge of the prosthetic. The acetone melts the encapsulated silicone, allowing it to blend naturally with the skin.
Transfer Acetone 100 ml to a disposable cup and use a synthetic, firm brush to remove the edge of the prosthetic. The acetone melts the encapsulated silicone, allowing it to blend naturally with the skin.
Step 3
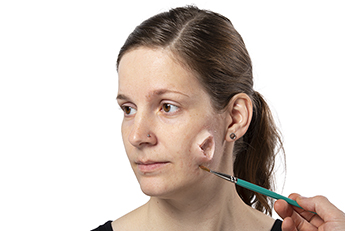
Add D 32 and Youth Red from the Coloring Vision Palette 18 Colors (Effects) to a Make-up Blending Plate. Then add a few drops of Make-up Blend 30 ml and pick up the product with a synthetic brush. Dab it on the prosthetic to mimic a red tint of natural skin.
Add D 32 and Youth Red from the Coloring Vision Palette 18 Colors (Effects) to a Make-up Blending Plate. Then add a few drops of Make-up Blend 30 ml and pick up the product with a synthetic brush. Dab it on the prosthetic to mimic a red tint of natural skin.
Step 4
Next, from the same palette, mix 081 and Lake Altrot again with a drop of Make-up Blend. Apply the blend with the tip of a synthetic brush around the wound using a speckle effect. A small blending brush is then used to blend it into the skin.
Next, from the same palette, mix 081 and Lake Altrot again with a drop of Make-up Blend. Apply the blend with the tip of a synthetic brush around the wound using a speckle effect. A small blending brush is then used to blend it into the skin.
Step 5
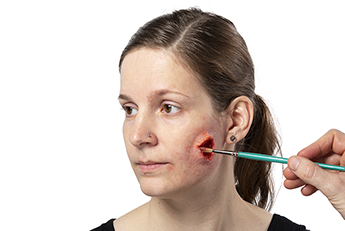
To color the inside of the wound, color 081 is applied first. Use a touch of Make-up Blend for this as well. Then, dab Lake Altrot into the deepest part of the prosthetic to create three-dimensionality.
To color the inside of the wound, color 081 is applied first. Use a touch of Make-up Blend for this as well. Then, dab Lake Altrot into the deepest part of the prosthetic to create three-dimensionality.
Step 6
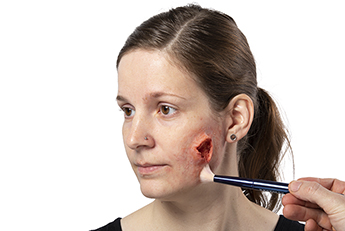
Using a fluffy blending brush, apply Translucent Powder 60 g (TL 1) in circular motions to the colors. This will set the bold make-up and extend its staying power.
Using a fluffy blending brush, apply Translucent Powder 60 g (TL 1) in circular motions to the colors. This will set the bold make-up and extend its staying power.
Step 7
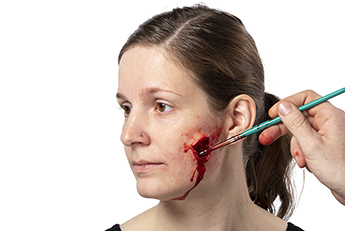
To add more creepy detail, with the help of a synthetic brush, now add Drying Blood 50 ml to the wound. Repeat this process until the blood flows out of the prosthetic and over the face. Use your fingers to add smudged details around the edges.
To add more creepy detail, with the help of a synthetic brush, now add Drying Blood 50 ml to the wound. Repeat this process until the blood flows out of the prosthetic and over the face. Use your fingers to add smudged details around the edges.
Step 8
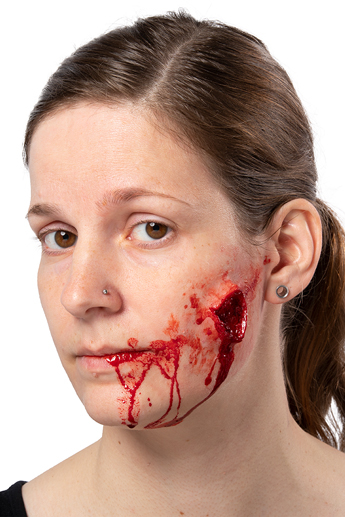
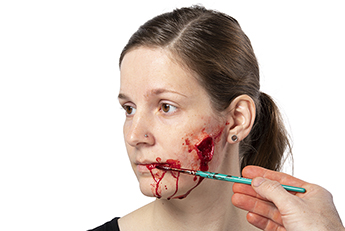
The final step is to apply Supreme Blood Internal 50 ml (light) to the corner of the lip on the prosthetic's side. Apply the product with a pointed brush. Then, the model takes a sip from a disposable cup of Supreme Blood to add more bloody detail.
The final step is to apply Supreme Blood Internal 50 ml (light) to the corner of the lip on the prosthetic's side. Apply the product with a pointed brush. Then, the model takes a sip from a disposable cup of Supreme Blood to add more bloody detail.