
Before
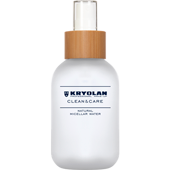
The skin should be free of any products. Use the Clean & Care Natural Micellar Water 120 ml to remove oils or impurities.
The skin should be free of any products. Use the Clean & Care Natural Micellar Water 120 ml to remove oils or impurities.

Step 1
To protect the skin, use Marly Skin - Skin Protection Foam before applying the prosthetic. This protective foam is applied to the parts of the face where the prosthetic will be applied.
To protect the skin, use Marly Skin - Skin Protection Foam before applying the prosthetic. This protective foam is applied to the parts of the face where the prosthetic will be applied.
Step 2
Apply Silicone Adhesive NEO Regular Bond 100 ml to the back of the prosthetic. After about 1-2 minutes, you can put the piece on the face. Press it on with your hands. Also, make sure to tighten the ends and touch up with some extra adhesive.
Apply Silicone Adhesive NEO Regular Bond 100 ml to the back of the prosthetic. After about 1-2 minutes, you can put the piece on the face. Press it on with your hands. Also, make sure to tighten the ends and touch up with some extra adhesive.
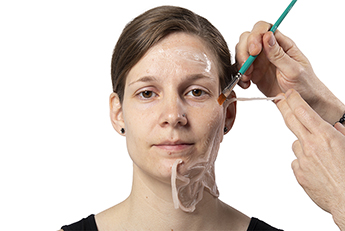
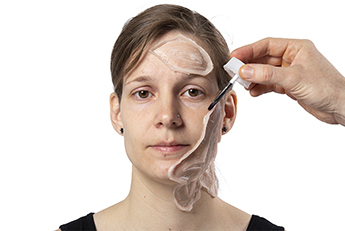
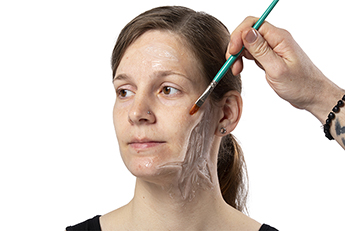
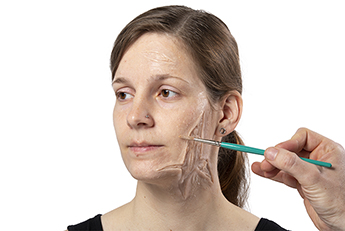
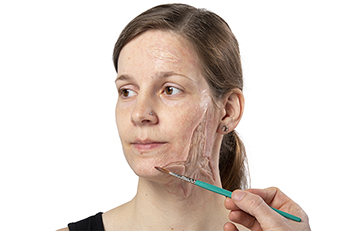
Step 3
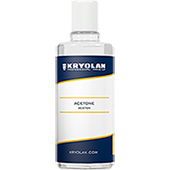
Transfer Acetone 100 ml into a disposable cup and use a synthetic, firm brush to remove the edge of the prosthetic. The Acetone will melt the encapsulated silicone, allowing it to blend naturally with the skin.
Transfer Acetone 100 ml into a disposable cup and use a synthetic, firm brush to remove the edge of the prosthetic. The Acetone will melt the encapsulated silicone, allowing it to blend naturally with the skin.
Step 4
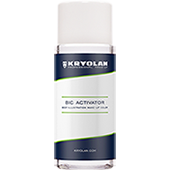
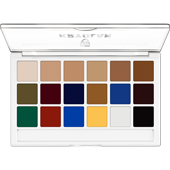
To color the attached prosthetic, use Body Illustration Make-up Color Set 18 Colors (Extra). Place a pointed brush in BIC Activator and mix the product with the color Alabaster from the palette to create a slightly translucent skin tone. Dab lightly over the edges to blend the color with the natural skin tone.
To color the attached prosthetic, use Body Illustration Make-up Color Set 18 Colors (Extra). Place a pointed brush in BIC Activator and mix the product with the color Alabaster from the palette to create a slightly translucent skin tone. Dab lightly over the edges to blend the color with the natural skin tone.
Step 5
From the same palette, mix color 510, a rich blue, with a little BIC Activator, and then load it onto a soft, synthetic brush. The color is applied slightly translucent to the natural contours of the face, the eye socket, and to the prosthetic.
From the same palette, mix color 510, a rich blue, with a little BIC Activator, and then load it onto a soft, synthetic brush. The color is applied slightly translucent to the natural contours of the face, the eye socket, and to the prosthetic.
Step 6
Now apply 080 from the palette using the same method. Use a pointed brush for this and apply the color in dabbing motions to simulate redness or "trauma" under the surface of the skin.
Now apply 080 from the palette using the same method. Use a pointed brush for this and apply the color in dabbing motions to simulate redness or "trauma" under the surface of the skin.
Step 7
Apply 082 (also diluted with BIC Activator) to the edges of the inner part of the wound. Use a square, synthetic brush for this purpose. Towards the center of the wound, apply a more translucent effect.
Apply 082 (also diluted with BIC Activator) to the edges of the inner part of the wound. Use a square, synthetic brush for this purpose. Towards the center of the wound, apply a more translucent effect.
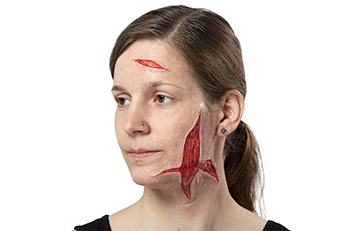
Step 8
Use a pointed brush to apply the color Lake to the prosthetic. Swirl the brush hairs over the paint until the brush has absorbed the paint. The deepest parts of the prosthetic are then shaded.
Use a pointed brush to apply the color Lake to the prosthetic. Swirl the brush hairs over the paint until the brush has absorbed the paint. The deepest parts of the prosthetic are then shaded.
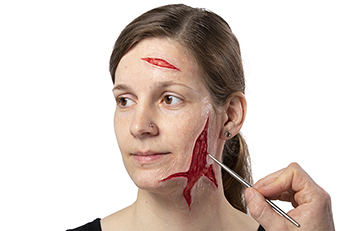
Step 9
The same color as in step 8 (Lake) is now applied to the corners of the prosthetic. For this, use a larger, synthetic brush that is soft and easy to blend. This will give the effect of a bruise on the torn skin. Apply the color in such a way that an effect of slight thirstiness is created under the skin.
The same color as in step 8 (Lake) is now applied to the corners of the prosthetic. For this, use a larger, synthetic brush that is soft and easy to blend. This will give the effect of a bruise on the torn skin. Apply the color in such a way that an effect of slight thirstiness is created under the skin.
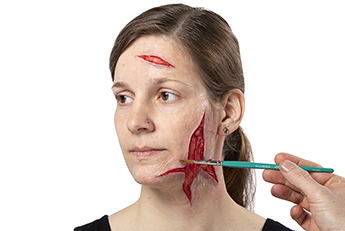
Step 10
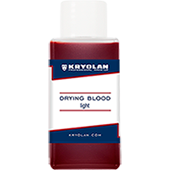
First, apply Drying Blood 50 ml (light) to the edges of the wound, then let it flow over the face in the most natural way possible. Use a pointed brush to do this. When the blood has dried, this will create a great contrast to the next blood that is applied.
First, apply Drying Blood 50 ml (light) to the edges of the wound, then let it flow over the face in the most natural way possible. Use a pointed brush to do this. When the blood has dried, this will create a great contrast to the next blood that is applied.
Step 11
Use a synthetic brush and your fingers to apply Drying Blood around the prosthetic, the surrounding skin, and on the lips.
Use a synthetic brush and your fingers to apply Drying Blood around the prosthetic, the surrounding skin, and on the lips.
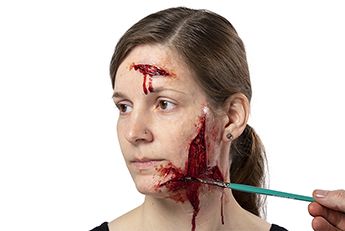
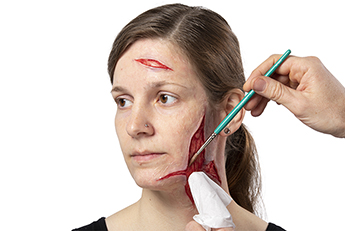
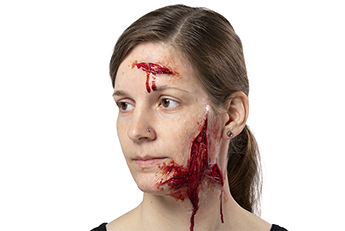
Step 12
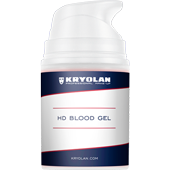
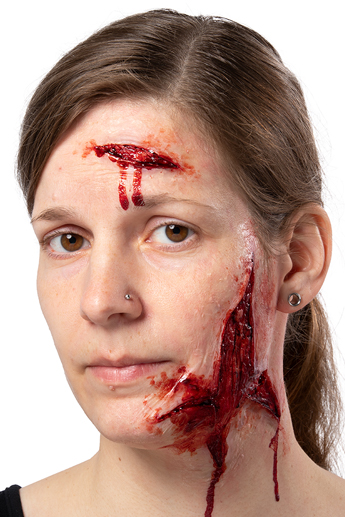
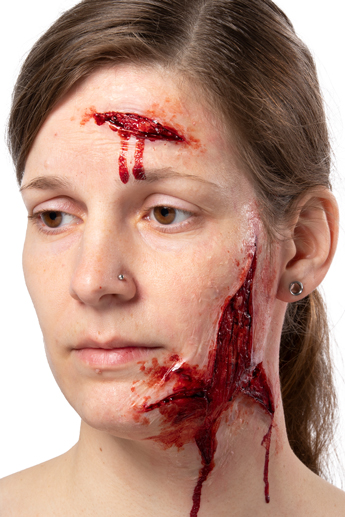
To complete the look, apply HD Blood Gel (dark venous) to the deepest areas of the wound to give the appearance of clotted blood. Use different-sized, pointed, and synthetic liner brushes - depending on the size of the area - and apply the blood.
To complete the look, apply HD Blood Gel (dark venous) to the deepest areas of the wound to give the appearance of clotted blood. Use different-sized, pointed, and synthetic liner brushes - depending on the size of the area - and apply the blood.